 I'm so glad you all told me the official name of this game. I had no idea what to call it! I'm not a big tutorial poster so this will be very primitive. (Also, as far as I know, I have not seen one of these made with SU products. It's fun to come up with something unique and I'm happy that so many like it. Just asking that if you decide to duplicate this idea, use it for workshops or to sell, please make sure to give credit where due and direct them here. Thanks!)
What you will need:
Textiles: Clear Shrink Paper (Shinky Dink), Thick Felt, Thick Plyable Plastic
Inks/Colors: Colored Pencils, White Stazon Ink, White Craft Ink, White Embossing Powder
Accessories: Sizzix Scallop Circle Die and Machine, Sewing Machine, MicroBeads, Circle Cutter, Cropadile, Ribbon
First, stamp your images with StazOn ink on rough side of shrink paper. I chose white as my images were bold but if you have line art, I would use black. Then color them in with colored pencils, cut out and bake to specifications on your shink paper instructions. Remember the pieces become 1/3 of the original size so be care not to use images that may be too small or too big. For the blog hop I was limited to the set I was using. I only have about 16 pieces here but I've seen these games that have 30 to 50 so go for it!
I then used my circle cutter and cut out two large circles of the plyable plastic. (I recycled a bag from a comforter I just bought). Then machine stitch (very close stitch) your two pieces of plastic together leaving an opening to put in your shrink pieces and microbeads. Don't over fill with the microbeads as you need to leave room for the pieces to shift and move easily. Next, stitch your circles completely shut. This was a challenge as the microbeads kept creeping to the opening. You may have to stitch a bit, take it off to shift the pieces away from your needle and start again. As you can see by my oh-so-wonderful sewing, I had to do that several times and even stitched around it again just to make sure it all stayed inside.
 This is the point where I stopped taking pictures of the process but the rest is fairly simple. I cut two pieces of felt with the circle cutter at exactly the same size that the plastic was cut. (I'm thinking you could use craft foam as well). I then stamped on the felt with white craft ink and heat embossed with white embossing powder. The felt I had was very thick and as long as you keep your gun moving, it won't hurt your felt a bit.
Then, take your Sizzix die and cut the scallop out of the middle of one of the felt circles for your front piece. I found the center of my felt circle by folding it two ways and marking on the back where they intersect. Then found the center of the die by measuring two ways and making a mark.
I then printed a list of the "I Spy" items on cardstock and cut a piece of the thick plastic to the size of my list. I placed the end of a piece of ribbon about 6 inches inside the list and used the heat gun to melt the edges together.
Take your back piece of felt, fold in half and cut a slit just large enough to fit your list into. Next, sandwich your plastic pouch between the two felt circles, insert the other end of ribbon attached to your list and sew together making sure that you stitch a bit further out than you stitched your plastic pieces together. That is important as you will then use your cropadile to punch holes on the outside to lace your ribbon - be careful not punch into the inside of the pouch and lose all the beads! (The pieces may slide as you sew so use pins if needed! And make sure to keep your list free of the needle so you only sew in the end of the ribbon)
Punch holes along the edges with your cropadile, then thread in your ribbon using a whip stitch. Tie the ends on the back and Voila! All done!
.jpg)
 This box served two purposes. We made this for my June stamp club. And it also is the 2nd of the Designing D's Secret Sister challenge: To make a box we haven't done before.
 The set I chose is "Life's A Breeze". There is a coordinating wheel that is also retiring called "Something Fishy".
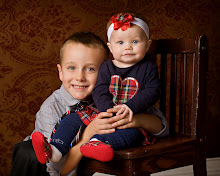
  I love this picture of my little boy when we traveled to California and he was still a baby... And had to scrapbook it!
 I still get very fascinated by gel cards! This one was made with a pocket so you could pull out a card to write on.
 This is an idea I've had rolling around for awhile. It is one of those toys that kids can play with (hopefully for some time!). There is a list of items that they need to search for and they can shake and spin it to find each of the items. This particular one is quite easy but would be great for little ones who are learning shapes and colors.
 This is the view of the back. I cut a slit so the list could be hid behind when not needed. I will post a tutorial of this after the hop so come back after the 16th.
.jpg) And on to the Blog Candy fun! Want to win this vinyl art Decor Element? First post on YOUR blog a link to MY blog with a little blurb about the blog hop and this specific post. Then leave me a comment here including a link to your blog. Comments will be accepted through 11:59 p.m. Mountain Time on June 16th. Then check back on Wednesday to see if you won! One entry per person/blog.
And on to the Blog Candy fun! Want to win this vinyl art Decor Element? First post on YOUR blog a link to MY blog with a little blurb about the blog hop and this specific post. Then leave me a comment here including a link to your blog. Comments will be accepted through 11:59 p.m. Mountain Time on June 16th. Then check back on Wednesday to see if you won! One entry per person/blog. 


 Would you believe I made all of this out of ONE pack of DSP and with sheets and scraps leftover?! No joke - you can get a lot of mileage out of these!

 We saw Wicked last Tuesday and... lemons, and melons and pears, OH, MY! I had goosebumps through the whole thing (someone tell me that burns calories)! Between the costumes, the music, the set, the acting, the singing, the comedy and the storyline with all the moral decisions for the characters, my mind was spinning! We had never seen it nor knew much of the story (as I didn't want to know so it would be more exciting). What a cool production! I so appreciate such wonderful talent.







 Posts
Posts


